3 Setup
The process of configuring Git and GitHub is a one-time setup and it can be a little esoteric. There will be a part where we describe to Git who you are, and then another to set up authentication to Github.
3.1 Configure git
Here we’ll update some settings within git on your machine.
First we’ll set your user.name so Git knows who you are.
In your Terminal, do this but use your name in quotes instead of “Mona Lisa”:
git config --global user.name "Mona Lisa"Now we’ll set your user.email.
In your Terminal do this but use your email:
git config --global user.email "email@example.com"You will want to use the same email when you create your GitHub account.
Lastly we’ll set git to name your default branch “main” instead of “master” as this is a new standard.
In your terminal, run this:
git config --global init.defaultBranch mainYou won’t get a response unless there was a problem.
In your terminal, run this:
git config --global pull.ff onlyThis sets a behaivor that is too complicated to explain now, but comes recommended in this very long but thorough explanation.
3.2 SSH Keys
There are a couple of ways to authenticate with Github from your computer. The book Happy Git with R recommends using personal access tokens and I think that is fine, but I prefer the one-and-done nature of SSH keys, so that is the method we will use.
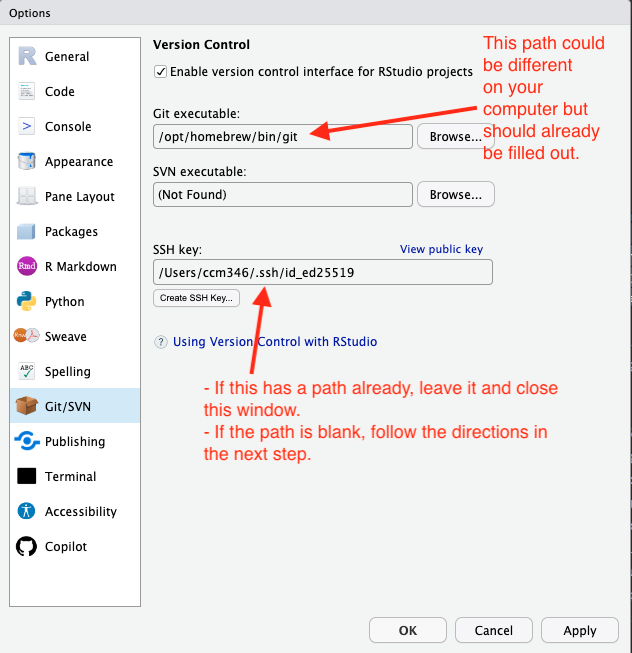
- After making sure git is installed, launch RStudio. (If it was already open, quit and re-launch it.)
- Go to the menu Tools > Global Options, then click on the Git/SVN tab.
- Check the Enable version control interface for RStudio button.
- There should already be a path included in the Make sure the path to the git executable is correct.
- If it is not, try quitting RStudio and relaunching it and do this step again.
- If it is still not there, talk to the prof. We’ll find it.
3.2.1 Create a new SSH key
If you SSH Key path was already filled then you can skip to the next step.
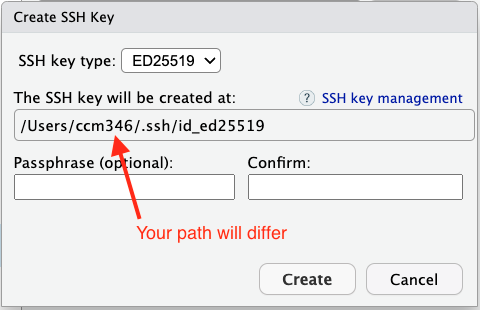
If you’ve never used SSH keys before, you’ll have to create one, but RStudio makes that fairly painless.
- Click on the Create RSA Key button.
- You should be able to leave all the defaults as they are. Leave the optional Passphrase field blank.
- Click Create.
- You should see a message that says “Key Created Successfully” and it might show you a pretty picture. Click OK.
3.3 Saving SSH key in Github
Now we’ll save the contents of that secret file on your computer into your Github account so Github “knows” about your computer.
First we need access to your “Public” key:
- In the RStudio Git/SVN window, click on the View public key button.
- This will open a new window with the contents of your public key.
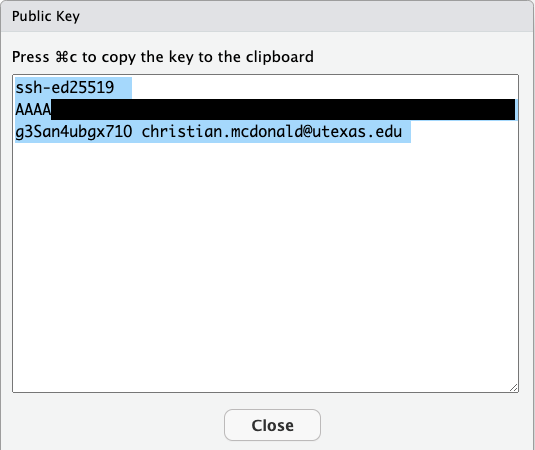
You’ll want access to copy that key to paste into Github in the next step:
- Go to github.com and click your user icon and choose Settings.
- In the user settings sidebar on the left, click SSH and GPG keys.
- Click New SSH key or Add SSH key.
- In the “Title” field, add a descriptive label for the new key. Name it after your computer, like “Personal MacBook Air” or something.
- In the “Key” field, so Command-V to paste your key into the box.
It will look something like this:
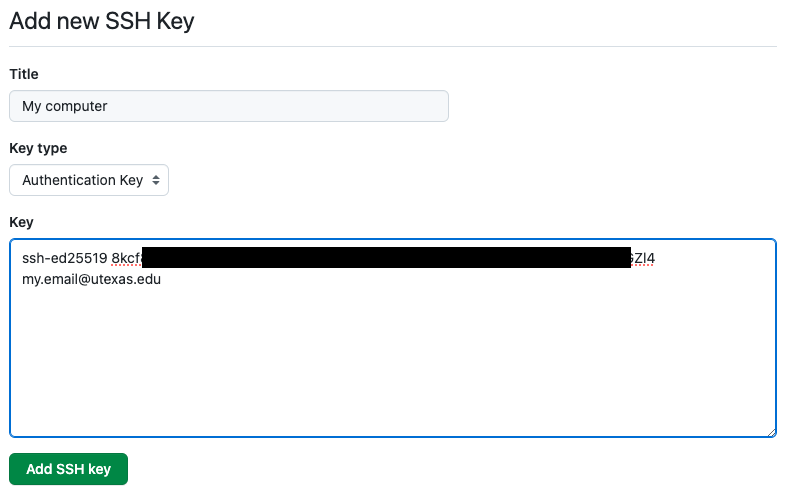
Almost done!
- Click Add SSH key.
- If prompted, confirm your GitHub password.
3.3.1 Test Github connection
- From your Terminal in RStudio, do the following command:
ssh -T git@github.com- If you are asked about “RSA key fingerprint”, type yes and hit return.
- In the end, you should have a success message like: “Hi username! You’ve successfully authenticated, but GitHub does not provide shell access.” If you get that message, you are good!