31 The static app framework
This chapter is being rewritten to utilize Github Codespaces as the primary development platform, which is a recent change. Please bring to my attention anything that doesn’t make sense.
31.1 Goals for this lesson
We will learn the features of this project rig in steps:
- Templates
- We’ll learn about static-site generators and templates.
- We’ll build a new page using the base template.
- Loops and Google Sheets data
- We’ll learn about using Google Sheets to manage data in our project.
- We’ll introduce loops to process data on our pages.
- Google Docs, ArchieML and baking pages
- We’ll learn about using Google Docs/ArchieML for content.
- We’ll learn about the bake command in the project.
- We’ll create blog pages based on a Google Doc source.
- We’ll update our index page to build links to the blog pages.
31.2 Set up development environment
We’ll be using Github codespaces for development. If you want to run this locally on your machine, see the README in the template repo.
31.3 Repo from a template
Like our previous two projects, you will start by copying a Github repo and then using a Codespace from your new repo.
Click on the green Use this template button and choose Create a new repository.
- This should allow you to create new repo based on icj-bootstrap-template. Call this new repo yourname-staticapp.
- Leave all the other settings the same and click Create repository.
- It takes several seconds to create your repo.
Click on the green <> Code button and then choose the Codespaces tab.
- Click Create codespace on main.
- This will take a bit more time, but should just be a couple of minutes. It will pause at one point and give you a prompt, but wait until you see it say “Detected Node.js” and let it finish that setup.
- Once the Node installation finishes, your browser will look like you have a version of Visual Studio Code open, and you do!
In the codespace’s VS Code Terminal, run:
npm install -g gulpIn the Terminal, run
gulp dev.
If you get errors, you might have to try npm install and then run gulp dev again.
31.4 Codespaces setup
Now that we have a codespace running, there are a couple of settings that we need to update to help us later.
31.4.1 Saving your preferences
We want to save your settings profile to Github so you don’t have to do this everytime you create a new Codespace.
- In the VS Code icon menu, not quite at the bottom, is the icon for a user.
- Click on that “person” icon
- If it says “Settings Sync is On”, then you are already saving your settings and all should be good. You can move on to the next section.
- If you have a choice of Back up and Sync Settings, then choose that.
- Follow the prompts to Sign in using your Github account. (This might force your codespace to restart.)
With this active, changes made to your Settings will be saved and you’ll be able to use them in any new codespace.
31.4.2 Adding extensions
- In the VS Code icon menus along the left edge, there is a puzzle piece icon to help us intstall extenstions. Click on that icon.
- In the search box, type in Nunjucks and look for the extension by “ronnidc”
- Click on the Install button to add it to your instance.
- Do the same for Path Intellisense by Christian Kohler and install it.
31.4.3 Editing preferenes
Next we need to adjust our settings to understand how to read Nunjucks files.
- At the bottom of the VS Code icon bar is a gear. Click on that and gear and go to Settings
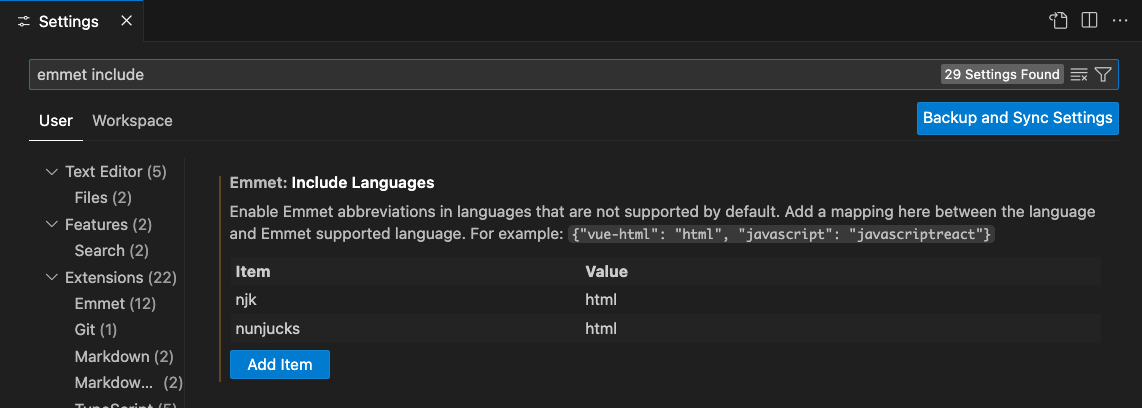
- Search for “Emmet include” and this should filter the results to Emmet: Include languages.
- Click on the Add Item button.
- For Item, put: njk
- For Value, put: html
- Click on Add Item again
- For Item, put: nunjucks
- For Value, put: html
In the end, it should look like this:
31.4.4 Other possible settings
We really should’ve done these earlier. 🤷
While optional, there might be some other preferences you might want to save while we are here. You can search for these in search bar:
- Editor > Word Wrap: I set this to on.
- Editor > Minimap: I uncheck this to turn it off. Minimap is the image of your file on the right-edge that allows you to scroll quickly up and down. I find it just takes away from space to edit my file.
- Editor > Sticky Scroll: Scroll with Editor: I uncheck this, but I could see how others might like it. (It’s hard to describe in words what this is.)
- Workbench > Tree: Enable Sticky Scroll: I uncheck this, but I could see how others might like it.
FWIW, and of these settings can be turned on/off temporarily for a file if you use Cmd+Shift+P and search for it.
31.5 Review the example site
Before we talk about how the project architecture is structured, let’s tour the example pages that are included. As we do so, we’ll just touch on how the example code applies to specific project features.
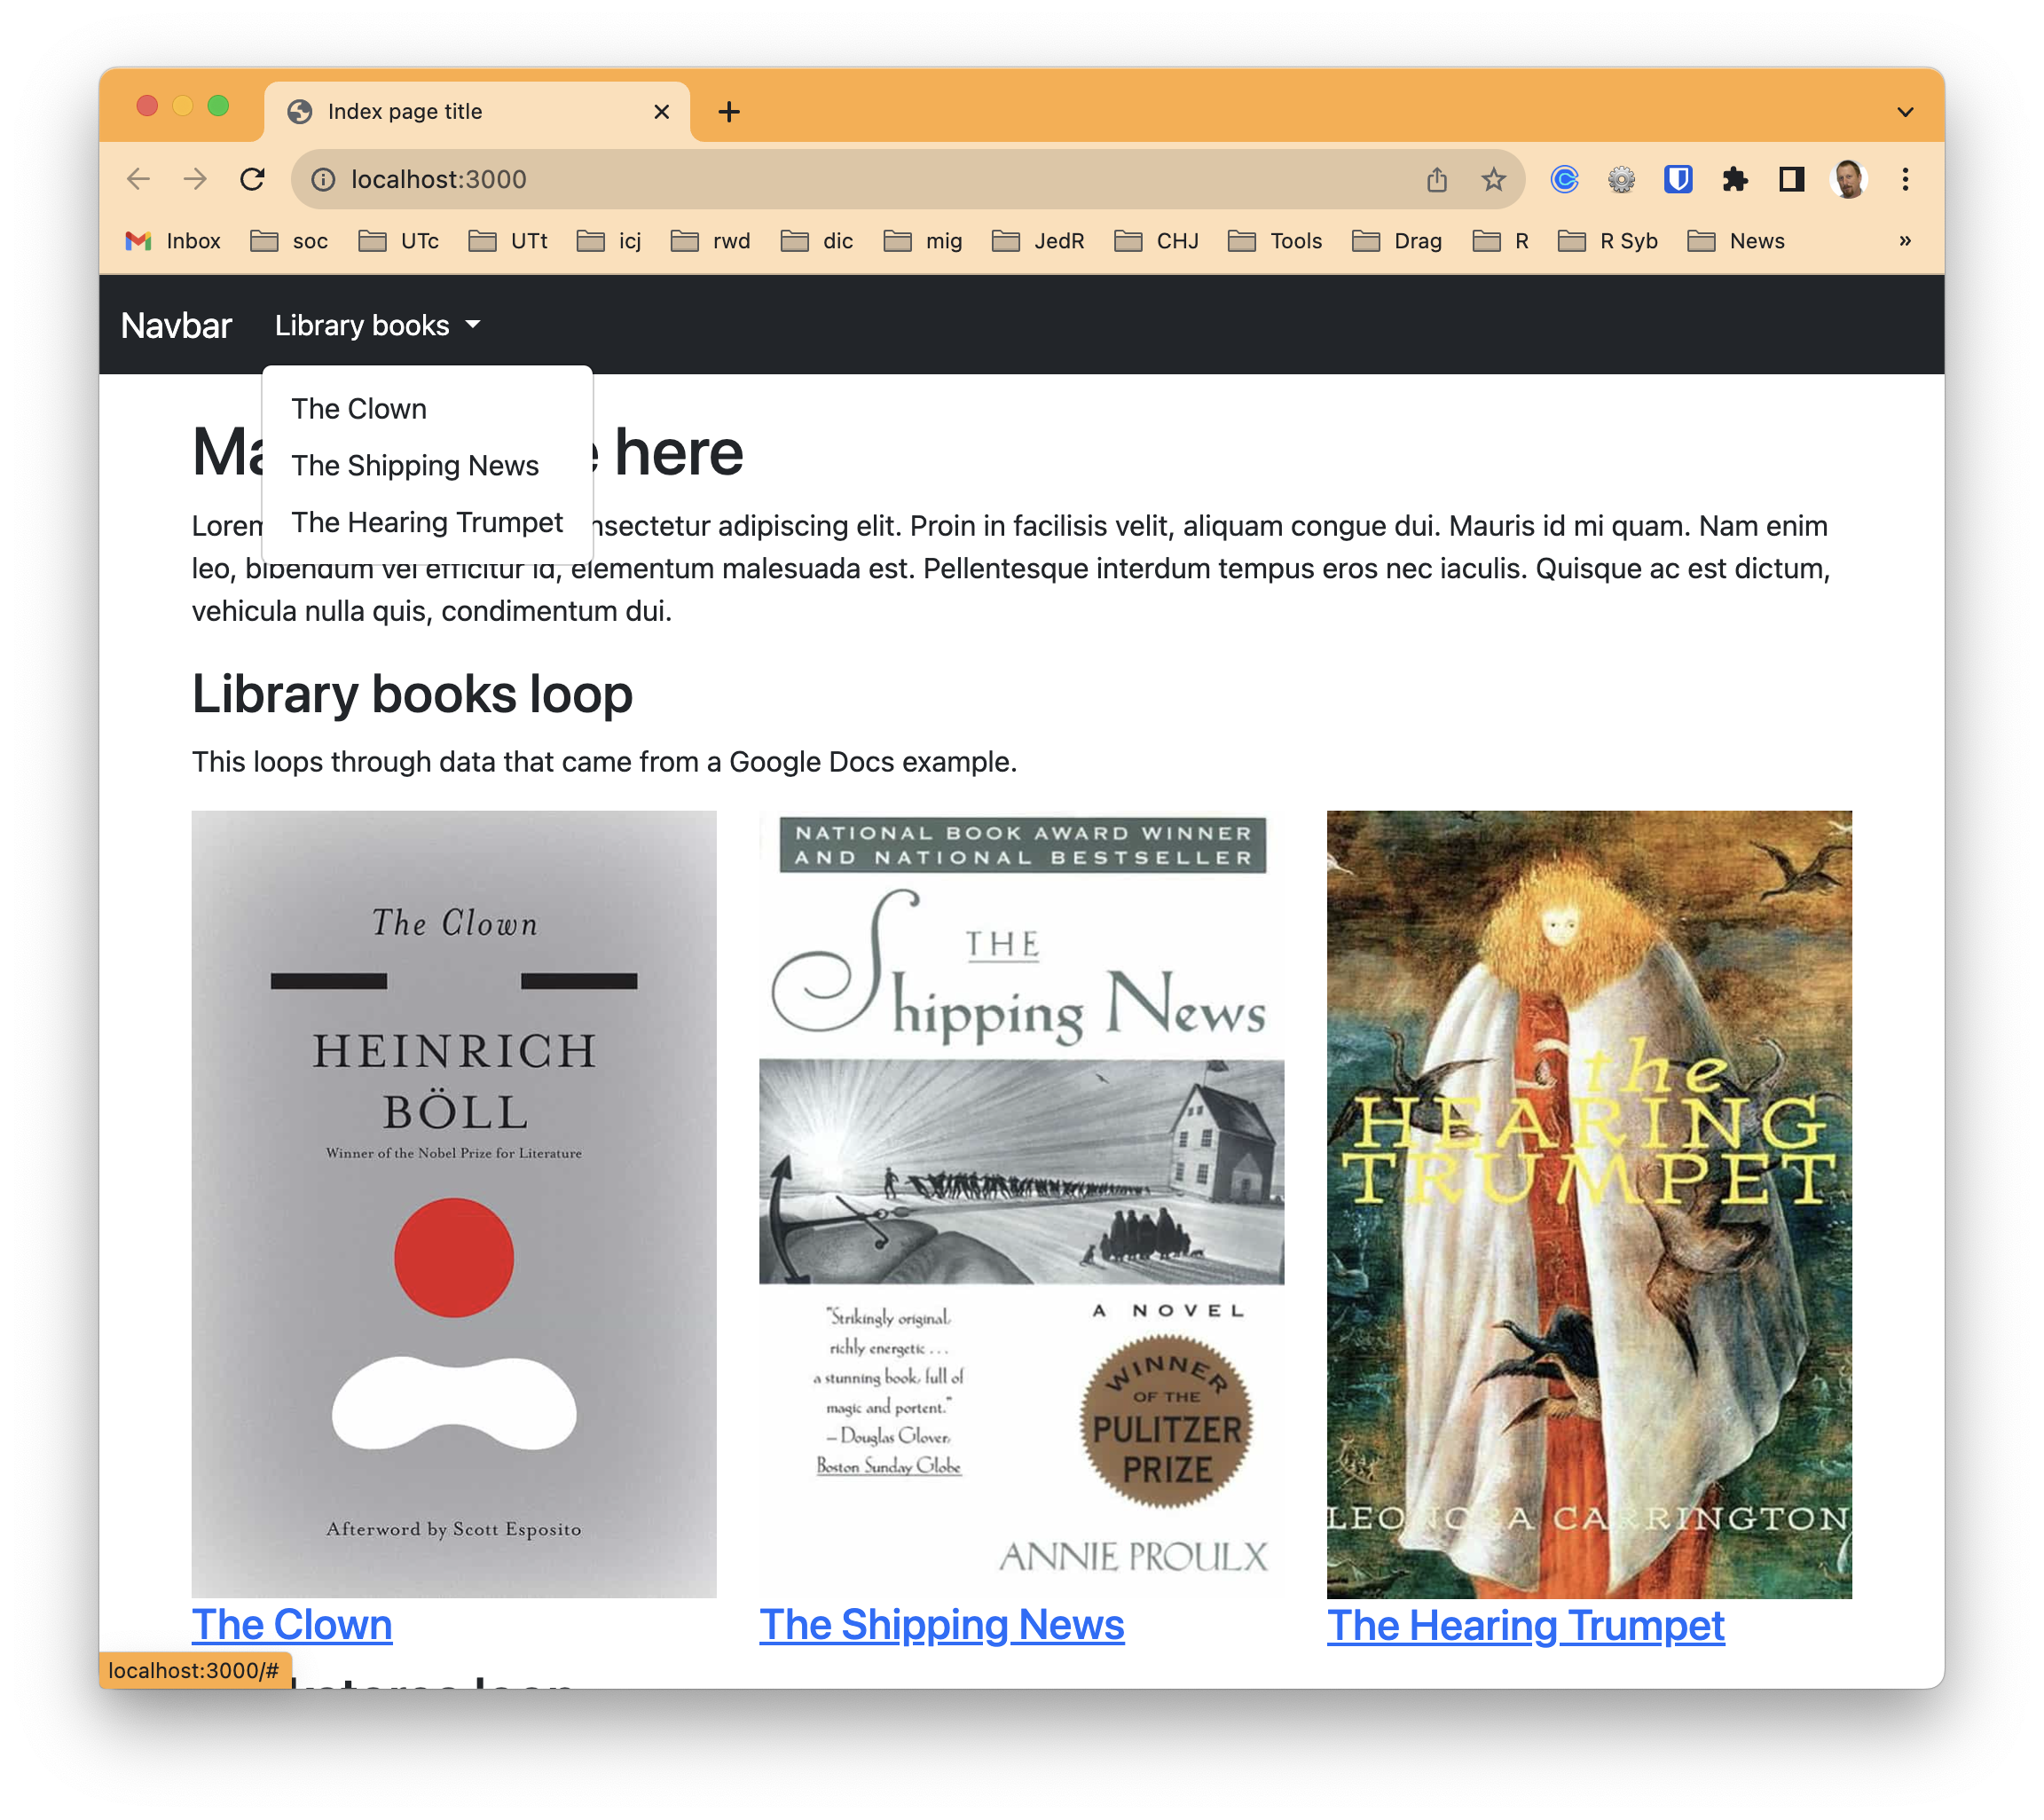
- All the pages on the site have a Bootstrap Navbar and a footer. Each page gets this from a single template, so we don’t have to duplicate code for each new page.
- The index also has a bookstores list down the page a bit, which is a loop over some data. As we explore the code later you’ll see there is only code for one entry, but we repeat that code for every row in data file. In this case the data was downloaded from a Google Sheets spreadsheet, an optional feature of the project. Sometimes having a structured data source like a spreadsheet is helpful.
- The index also has a listing of three books. This is also built within a “loop” that allows us to repeat the same code over and over. In this case our book data was downloaded from a Google Docs file written in a special structure called ArchieML, developed by The New York Times.
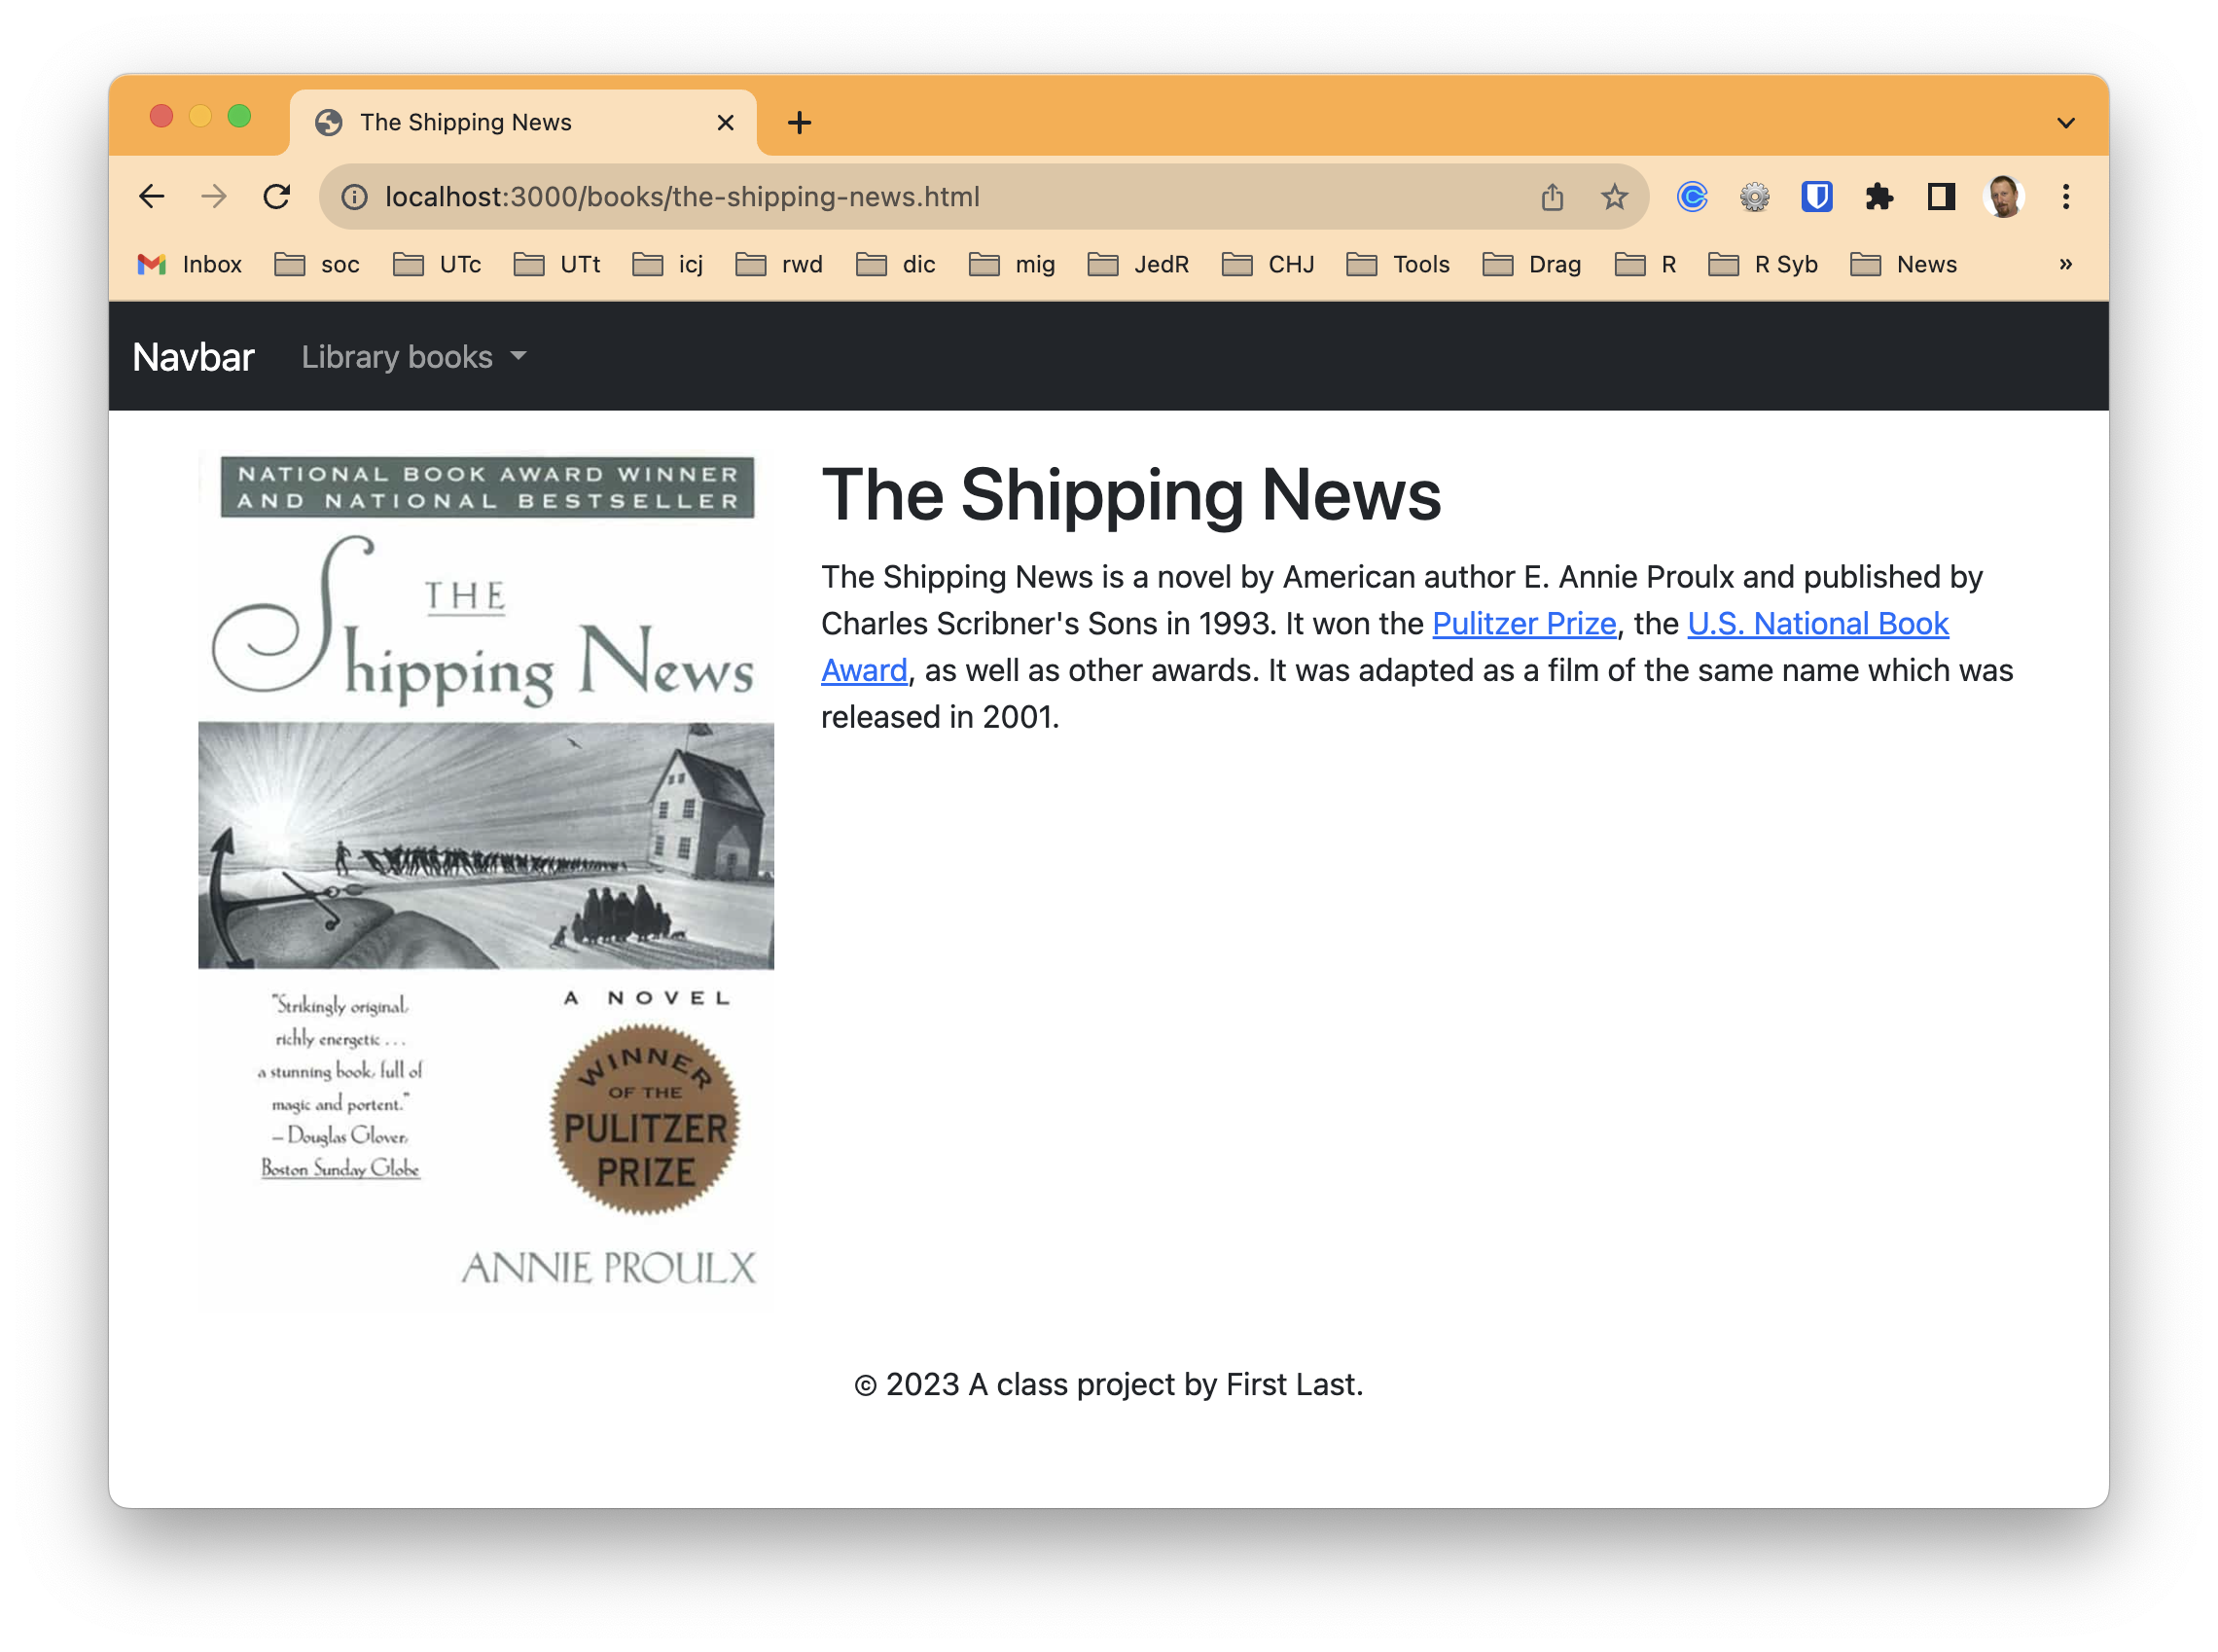
- Lastly, there are individual pages for each book listed, which serve as an example of detail pages built from the same template. Only the text and image content is different for each page, but the structure for each page comes from the same template.
- These specific book pages were created using another feature of the project where we can “bake” pages from data. Instead of a human creating a new file for each library book, they were generated automagically based on data from the Google Doc. If there were 100 books in the data, it would’ve built 100 pages.
Storing our content in Google Docs and Sheets might seem overcomplicated at at first, but it allows us to use Google as a content management system of sorts where many people can collaborate on the content and stay our of our code. It’s super powerful, and used by newsrooms like NYT, NPR and The Texas Tribune.
31.6 Understand the project structure
The README.md in the project template has details about how different features work. READ THE README. While the README file is in your project, you might find it easier to read the README online. We will also go over it in class (or through video).