🎯 Goal: By the end of this chapter, you’ll know how to setup a Github project for collaboration. You’ll also know some best practices when working with others on a shared project.
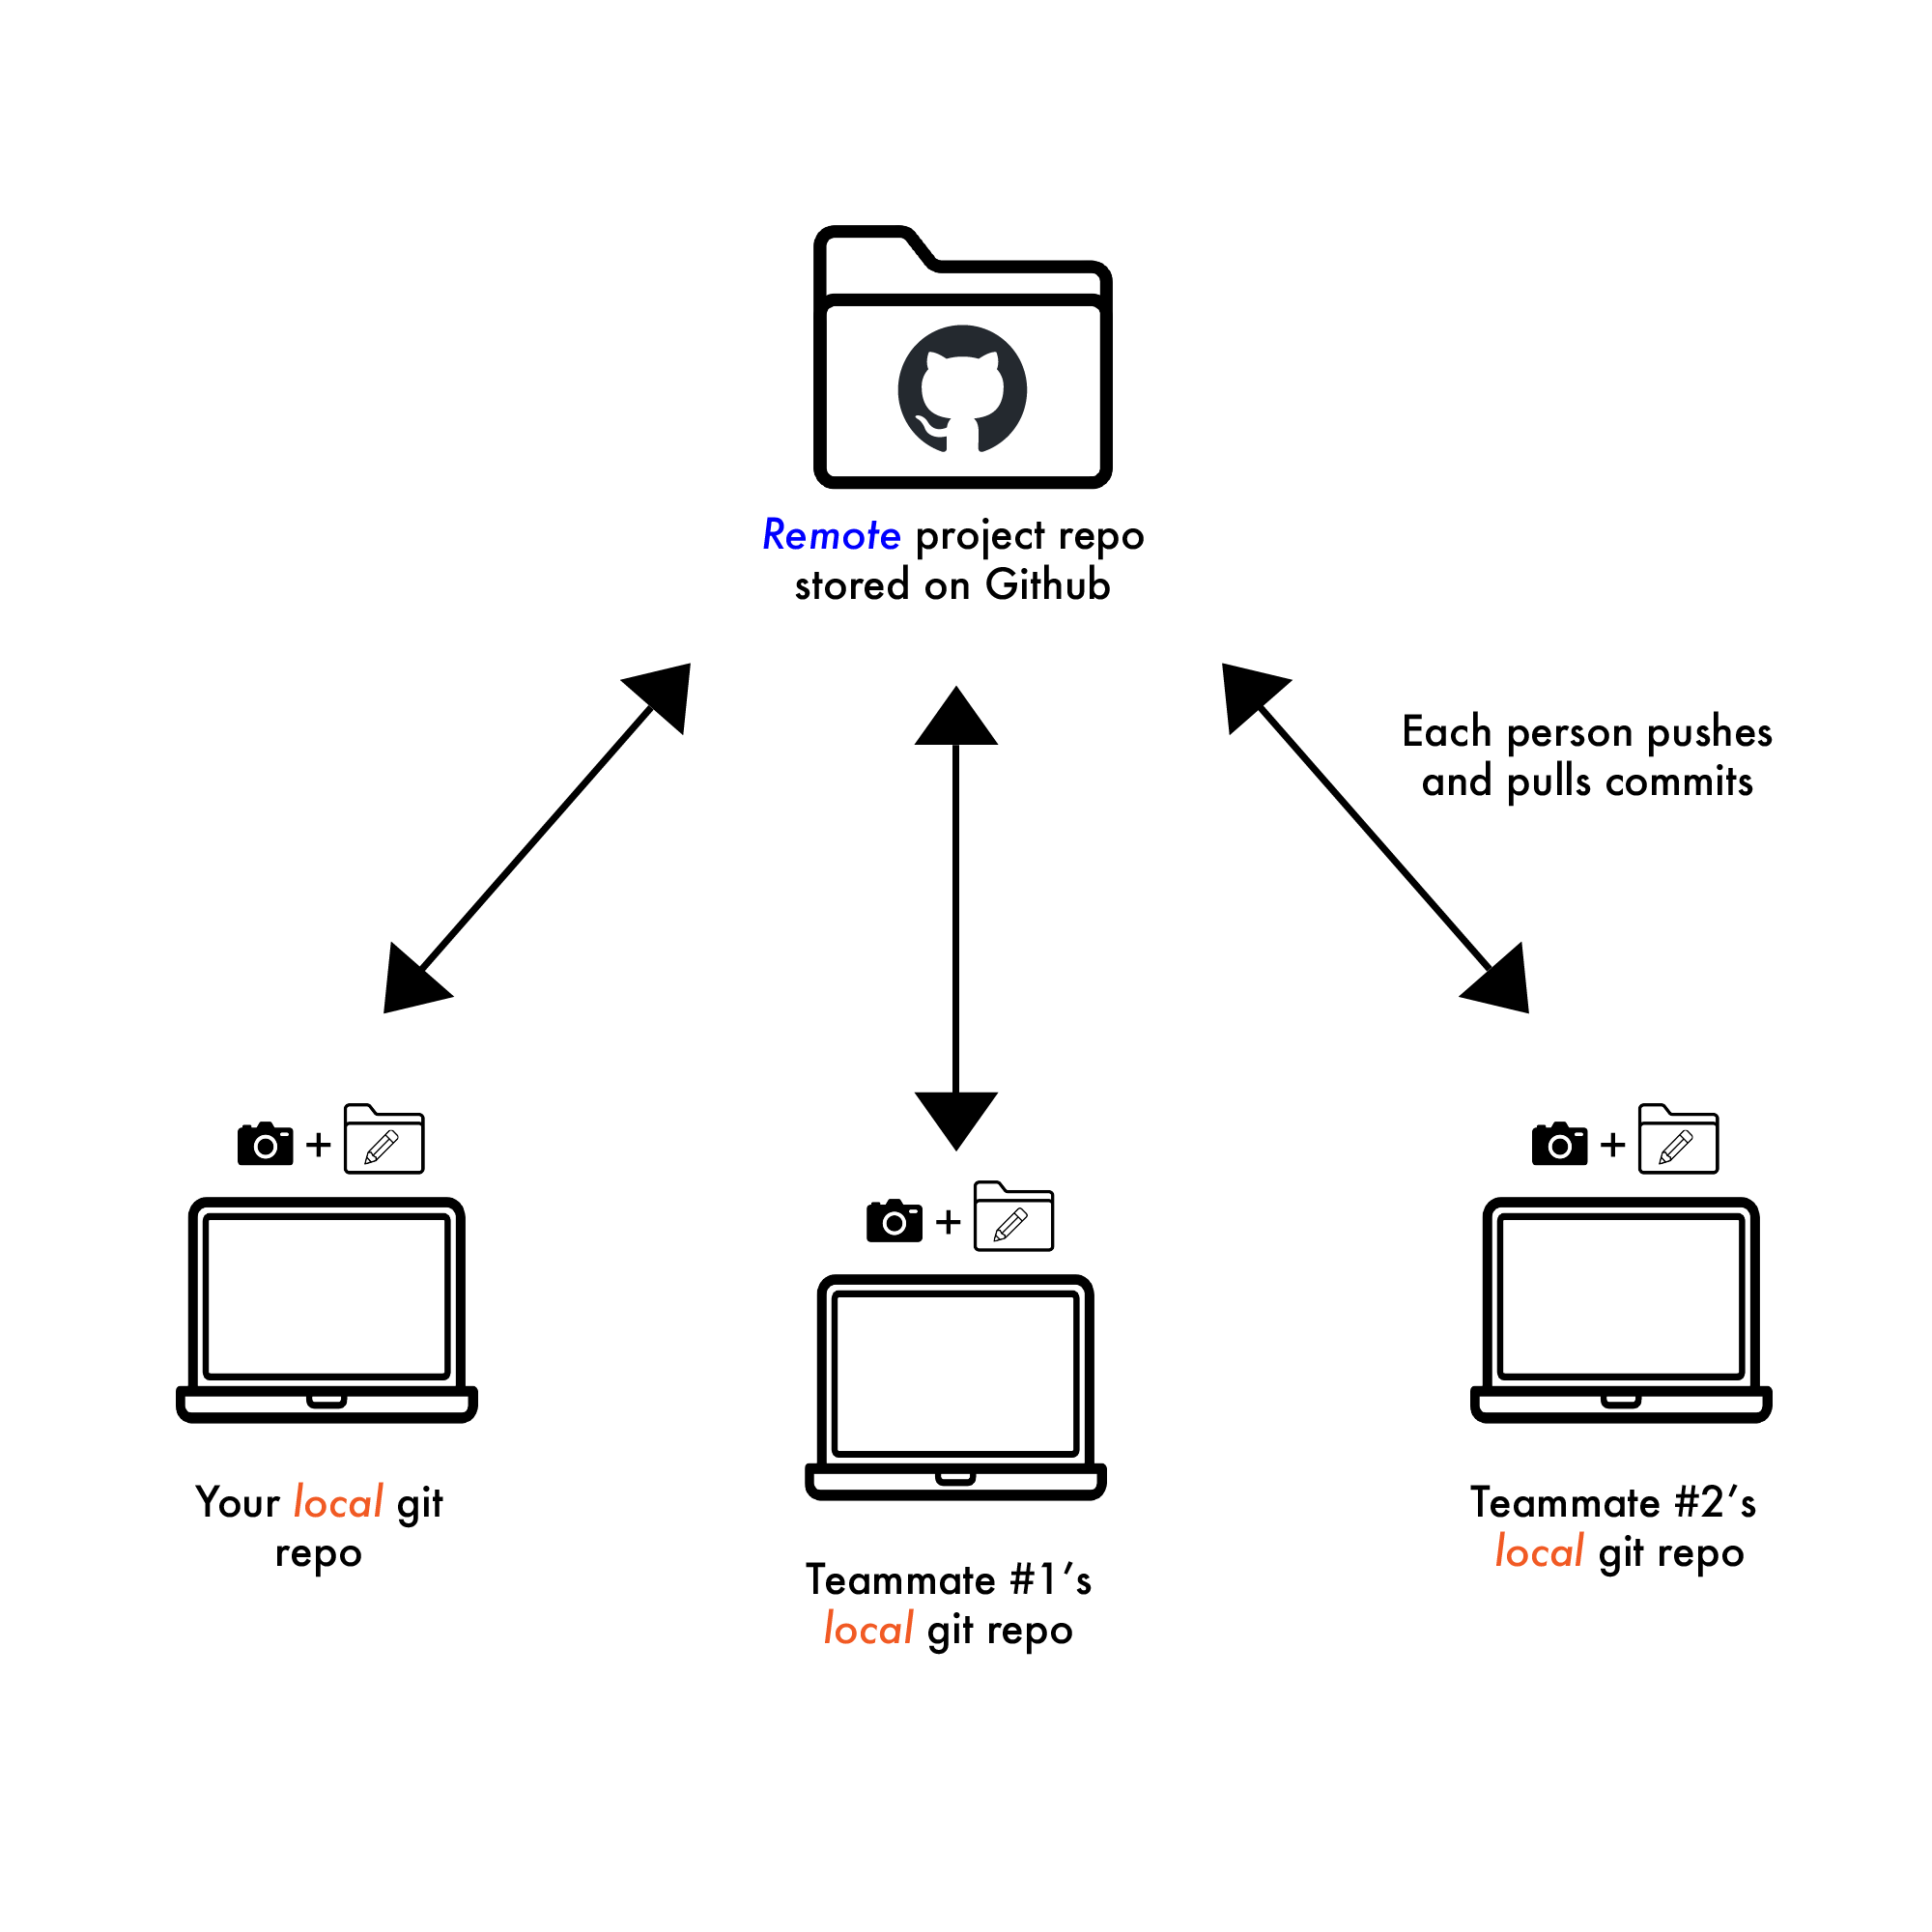
Now that you can push your changes to GitHub, it’s time to talk about how to collaborate with others on the same project.
One of the best things about keeping your code in a Github repository is that it allows you to collaborate with other people on the same coding project. Now, to make these collaborations work smoothly there are some best practices and processes you will need to follow.
16.1 Basic Git workflow with a team
When working in a Git project with other people, the collaboration process builds upon the basic workflow we laid out in the Updating Your Repo chapter.
Before working on your own changes in your local repo, you will pull down the most recent version of the Github project to make sure you’re incorporating the most recent changes to the project. This helps you stay in sync with your team and prevents you from overwriting each others’ work and creating major conflicts later.
After grabbing the most recent version, each member of your team will then follow the basic git workflow of making changes to the files on their local repository, committing the changes, and pushing the changes up to the shared remote project stored in Github.
We’ll go over the basics of setting up this kind of shared project below.
16.2 Setting up the shared Github project
16.2.1 Step 1: Create the repo
Only one group member needs to create the GitHub repo (you already know how, just like we did in the Push the Initial Commit to GitHub chapter.
Once the repo is created, the owner can add team members.
To add team members, the owner will do the following:
Go to the repository on GitHub.
Click Settings → Collaborators.
Add the teammate’s GitHub username.
Note: This action will send them an invitation. They must accept it before they can push changes.
16.2.2 Step 2: The collaborator clones the repo
Once added as a collaborator, the second person can make a copy of the repo on their own local machine. This process of copying a repository onto your computer is called cloning in the Git world.
We’ll walk through how to clone a repo in a moment, but first, let’s make sure you know where you should clone things.
Choose where to clone your repo:
Using the cd command, navigate in your terminal to the folder where you keep your coding projects. For example, a good place for this might be in a projects folder inside your home directory or your Documents folder.
If you need to create a folder for your projects, you can do this in the terminal like this:
cd ~              # Go to your home folder
mkdir projects    # Make a folder called 'projects' (if it doesn't already exist)
cd projects       # Move into that folder`
Clone the repo:
Now that you’re in the right place, you’re ready to copy the repo onto your local machine following the steps below.
In Github, do the following:
Navigate to the repo you want to clone.
Click the big, blue <> CODE button (at the top right).
Navigate to the SSH tab in the dropdown menu.
You will see a box with something like: git@github.com:username/repository-name. Click the icon next to this box to copy it to your clipboard.
In your Terminal window,
type the following command, replacing repo name with the one you copied from Github:
git clone git@github.com:username/repository-name
Hit Enter / return to run the command.
This creates a local folder with all of the repo’s contents and Git history within the projects folder on your computer.
You can check to make sure this worked by doing the following:
Run the list command below inside your project folder where you cloned the repo:
ls
Locate the name of your cloned repo in the files list.
Use the cd commmand to navigate into your repo folder, replacing folder_name with your repo name:
the cd folder_name
Now, run the ls command again to see your project files.
You should see a copy of all the project files that matches the version of the project you cloned from Github! You’re now ready to start collaborating!
16.2.3 Step 3: Everyone pulls before they work
When collaborating with others, it’s important to stay in sync with one another. In Git, we do this by pulling down changes onto our local machines. Essentially this works in the opposite way of pushing changes.
When we use git pull, we’re simply asking Git, “Hey, can you give me the most recent version of the project, including any changes that were made by my teammates since the last time I worked?”
Before making any changes in our project, always run from inside your project folder:
git pull
This downloads any changes pushed to GitHub since you last worked from your specific machine. These changes might include changes your teammates made, but could also include changes you made if you’re working on a different computer (yes, you can do that with Git).
Warning
Skipping git pull is more likely to lead to merge conflicts when Git sees two people made changes to the same thing, but they don’t match. We want to avoid this whenever possible to make our project workflow more efficient and less prone to errors.
16.3 Each Person Works, Commits, and Pushes
When working collaboratively on a coding project, your team will follow the basic Git workflow to keep things smooth, clean, and easy to manage.
The basic Git workflow:
You and your teammates take turns:
Making changes locally to project files on your computers.
Staging and committing the changes using Git (git add, git commit -m).
Pushing those changes to GitHub (git push).
And remember, every time you go to work on your project, you and your teammates should pull before making your own edits by using git pull. 😉
Next up:
You’ll learn what to do if you run into merge conflicts while collaborating.
 Before working on your own changes in your local repo, you will pull down the most recent version of the Github project to make sure you’re incorporating the most recent changes to the project. This helps you stay in sync with your team and prevents you from overwriting each others’ work and creating major conflicts later.