15 Updating files
🎯 Goal: By the end of this chapter, you’ll know how to:
- Make a meaningful change to your project.
- Stage and commit that change using Git,
- Push that change to GitHub to save your work.
You’ll also practice writing good commit messages and checking your work.
15.1 The basic git workflow
Now that we have our local repository setup and connected to our remote repository on Github, let’s briefly go over the basic Github workflow you will repeat over and over again as you work on your project.
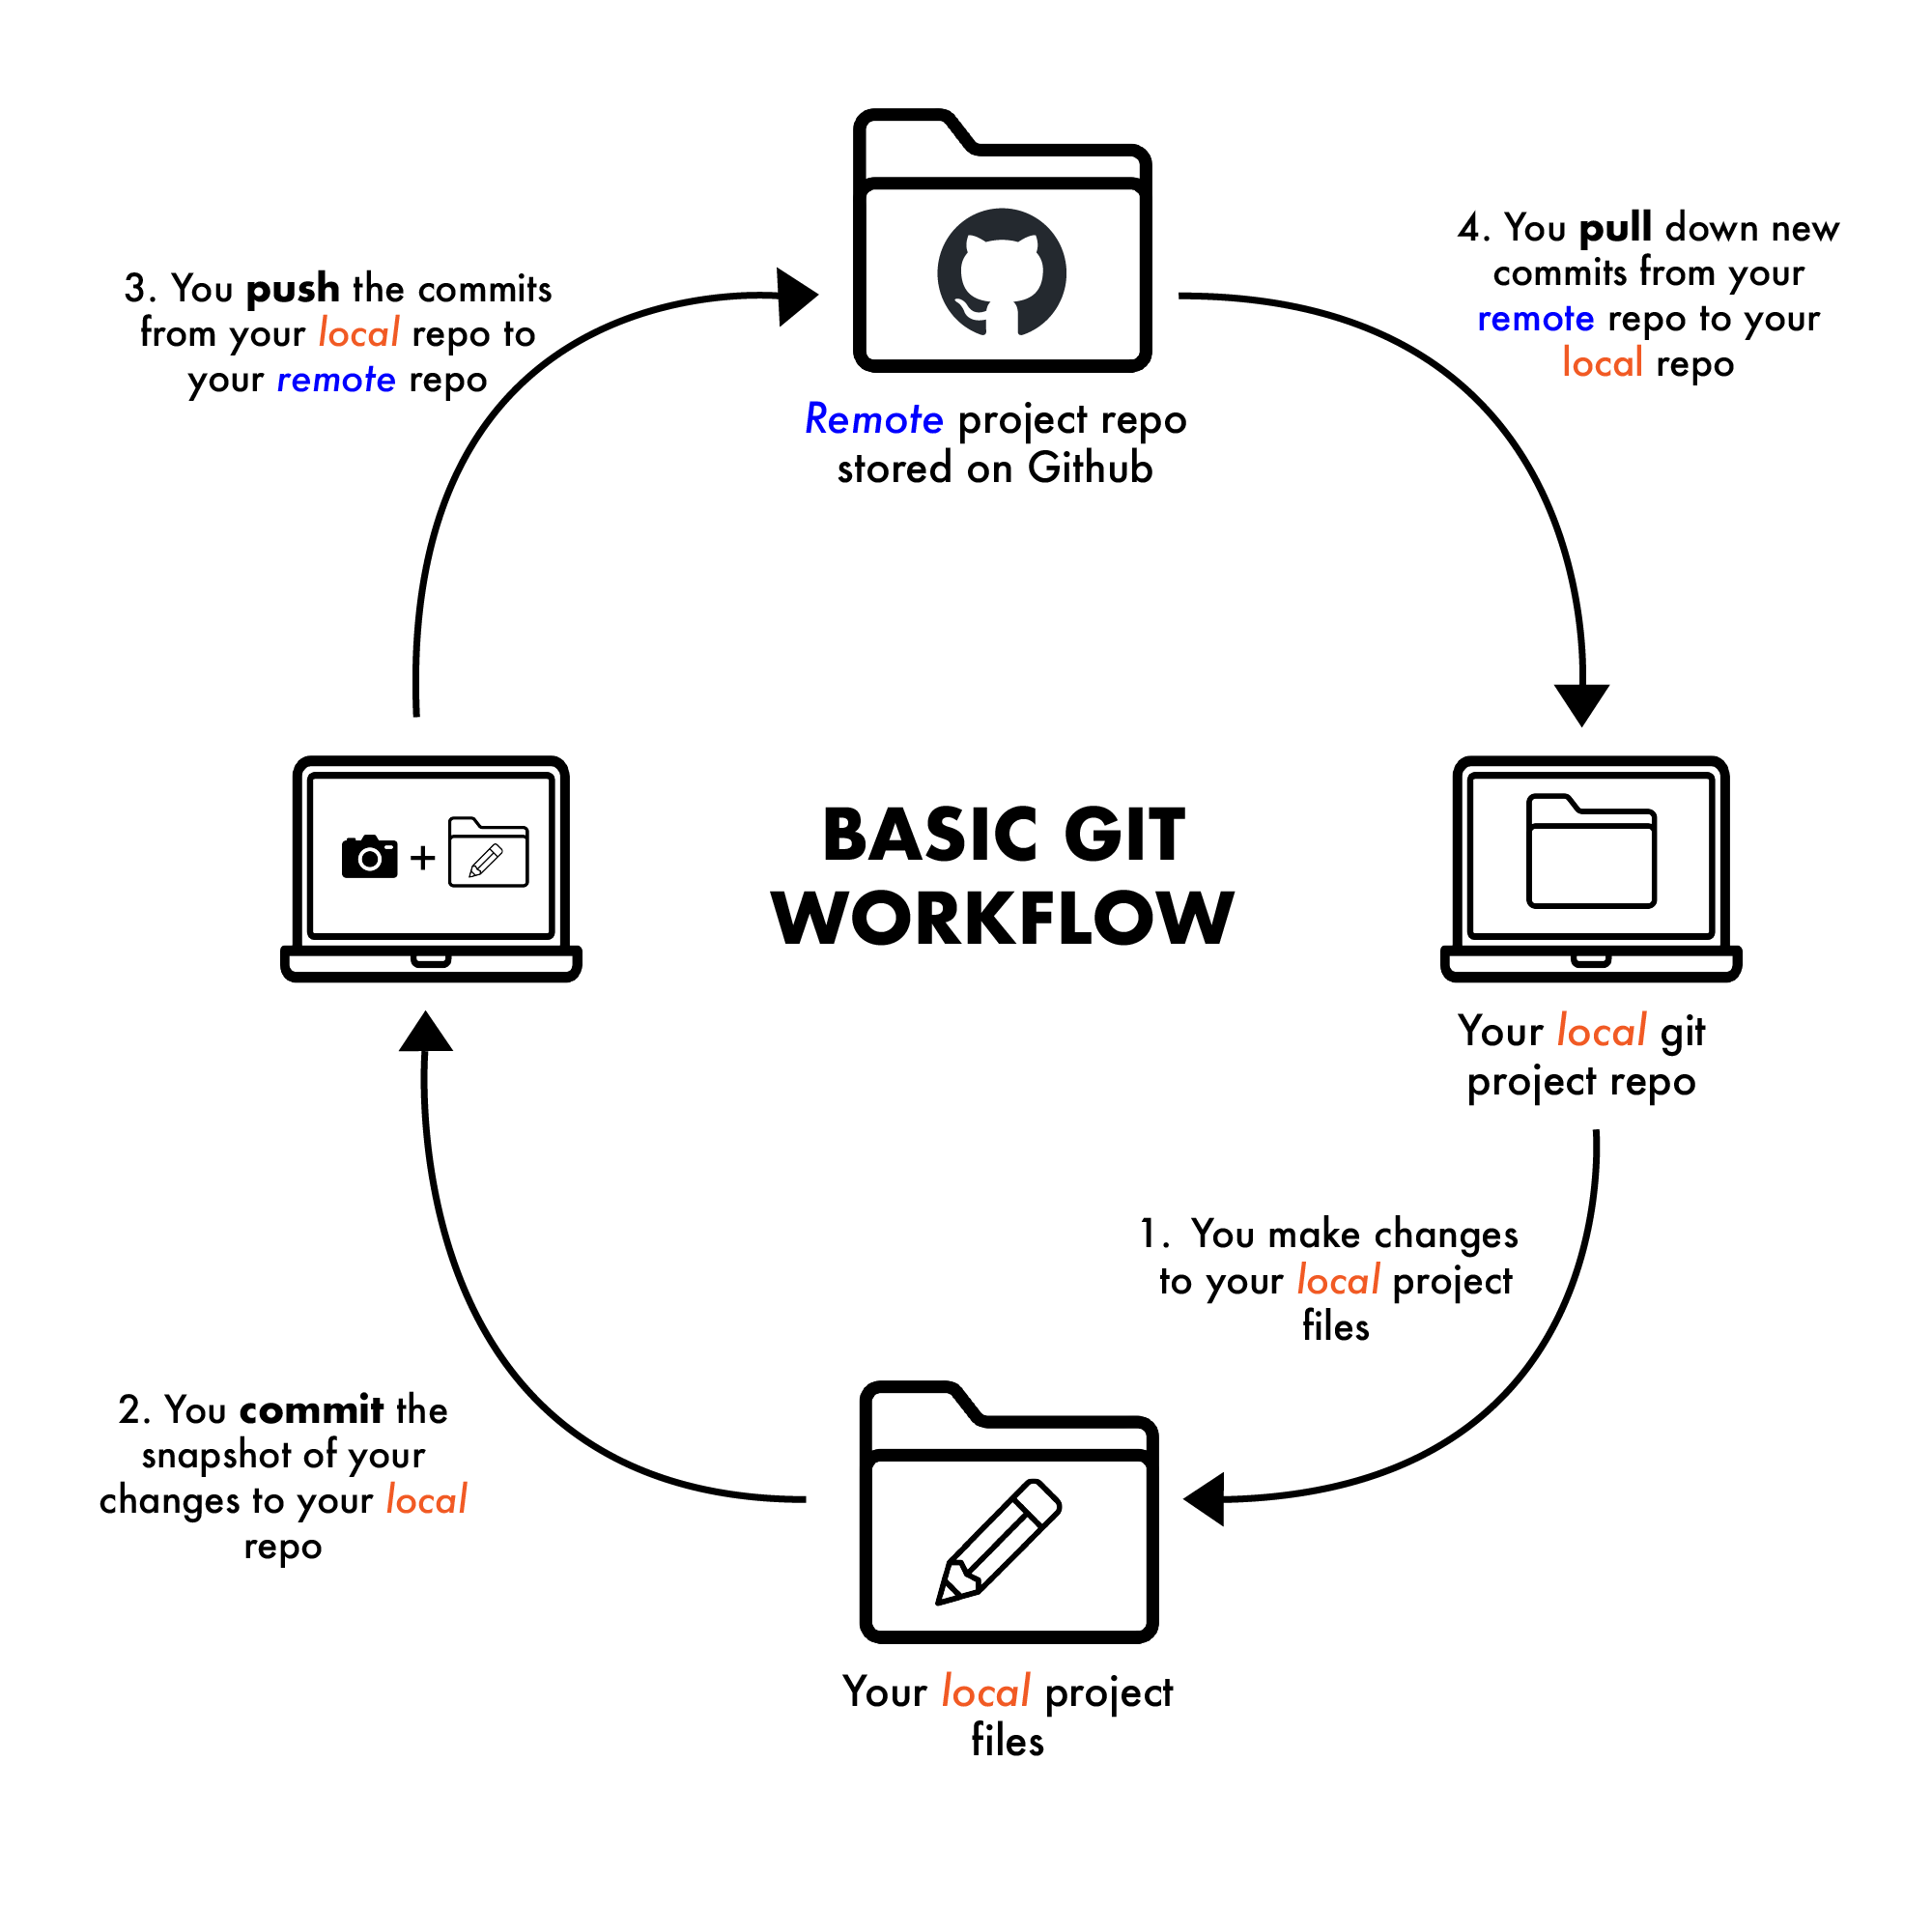
The basic git workflow goes like this:
- You make changes to your local repository files.
- You take a snapshot of those changes by committing them on your local repo.
- You push those committed changes to Github to track.
- Before making more changes, you pull down the most recent changes from Github.
- Rinse and repeat.
Some additional steps may be added if you begin using more advanced features in Git later on – especially when working with a team – but the basic steps outlined above will still apply even when working with more complicated workflows like feature branches and pull requests.
We’ll practice this workflow in the sections below.
15.2 Make a small change
To see this process in action, let’s make a couple changes to our project.
Open the Quarto file you made in Chapter 1 (e.g.,
01-index.qmd)Replace the auto-generated text and code blocks in the file with the following (feel free to copy/paste):
---
title: "Intro to Git"
format: html
---

# Summary

Here is a summary of the `mtcars` dataset.
Under the summary header and description, add a new code block with the following:
summary(mtcars)Save the file.
Now that we’ve made a change to our files, let’s check in with Git:
Go back to your Terminal window, and run the following:
git status
The Terminal should respond with something like this:
On branch main
Your branch is up to date with 'origin/main'.

Changes not staged for commit:
  (use "git add <file>..." to update what will be committed)
  (use "git restore <file>..." to discard changes in working directory)
        modified:   01-index.qmd
Let’s break this down:
- We see the label
modified:next to our filename, which tells us that Git sees that something has changed. - But, the file is under the
Changes not staged for commit:section and in red font, which tells us that Git hasn’t staged it yet (so it won’t be saved in the next commit).
15.3 Stage changes (git add...)
Now that you know Git sees the change, you need to tell Git, “Hey, save this file in the next snapshot.”
Like with our initial commit, you’ll prep your files by adding — or staging — them for your next commit.
This time around, we’re going to be a bit more surgical with the files we commit by only adding the individual file rather than using the . to add all files.
To stage only your index file:
Run the following:
git add 01-index.qmdCheck your Git status again by running:
git status
You should see your 01-index.qmd file in green, along with following message:
Changes to be committed:
  (use "git restore --staged <file>..." to unstage)
  modified:   01-index.qmd`
🎉 Great! Your changed file is now staged and ready to commit.
15.4 Commit your change (git commit -m)
Now, we’ll save the snapshot of our updated file in Git’s memory. Remember, when we save snapshots, we need to include a descriptive commit message noting what we changed. Git commits always need a message attached to them.
A few best practices to keep in mind when writing commit messages:
- Use present tense:
"Add summary of...", not"Added...". - Keep things short but descriptive.
- Think: “What changed in this version?”, then write that in the message.
✅ Good commit messages make it easier for you and others to pick up where you left off. If something breaks during an update or if you need to go back to a prior version, commit messages will help your retrace your steps.
With those things in mind, let’s practice writing a descriptive commit message for your change to the 01-index.qmd.
Type something like the following and hit enter:
git commit -m "Add summary of mtcars dataset"
Terminal will respond with a summary of insertions and deletions in your file.
A quick word of caution about the -m flag and Vim
Git commits always need a message attached to them. The -m flag tells the command line that we’ll be writing our message inline along with our commit command.
If you forget to include that message flag, the Terminal will open its default text editor called Vim. If you find yourself in this scenario (and you likely will at some point), don’t panic. There’s a section on getting out of Vim in our Intro to Terminal book.
15.5 Push your commit to GitHub (git push)
Now, that our changes are staged and commited, we’ll send the snapshot from your computer to GitHub by pushing our changes.
Push your new commit by running:
git push
Now go to your repository on Github — you’ll see your commit listed under the Commits tab and your file under the <>Codetab! (You may need to refresh)
You may be wondering why this push command was shorter than it was last time. In your last push, you needed to connect local project (the one on your computer) to the remote repository on Github and connect your main branches.
Since you already connected your Quarto project to Github and connected your branches, you can just use the git push command now. No need to redo things!
15.6 Git workflow best practices
Before we move on, here’s a few key best practices to keep in mind as you’re getting used to working in Git:
- Commit early, commit often: Save your work frequently in small, logical chunks. This makes changes easier to track, understand, and roll back.
- Stage changes selectively: Use
git add <filename>(instead ofgit add .) when you want more control over what goes into each commit. Being surgical helps keep things clean. - Write clear commit messages: Use concise, meaningful messages that explain why the change was made. (e.g., “Fix typo in introduction”, not just “update”)
- Check status regularly: Run
git statusoften to see what’s changed and what’s staged.
15.7 🎯 Checkpoint
In this chapter, you learned the basic git workflow by:
- Making a change to your local project.
- Staging the changes in git (
git add ..). - Taking a snapshot of the changed files (
git commit -m ...). - Pushing your changes to Github (
git push).
You also learned a few more best practices to keep things clean and manageable.
This is the cycle you will repeat over and over again as you work on coding projects using git.
Next up:
We’ll learn how to make changes, track versions, and collaborate like pros.