Appendix B — Using Google Fonts
Using Google Fonts used to be more intuitive than it seems to be now. This is a super quick primer on how do to it.
- Go to Google Fonts.
- You might type something into the preview window so the preview words make sense, like “The quick brown fox jumps over the lazy dog.”
- Browse or search for a font you want. You can use the filters to find certain types of fonts.
- Once you find something you like, click on the font page so you can see all the styles available.
- Click on the + symbol to add the font to your selections.
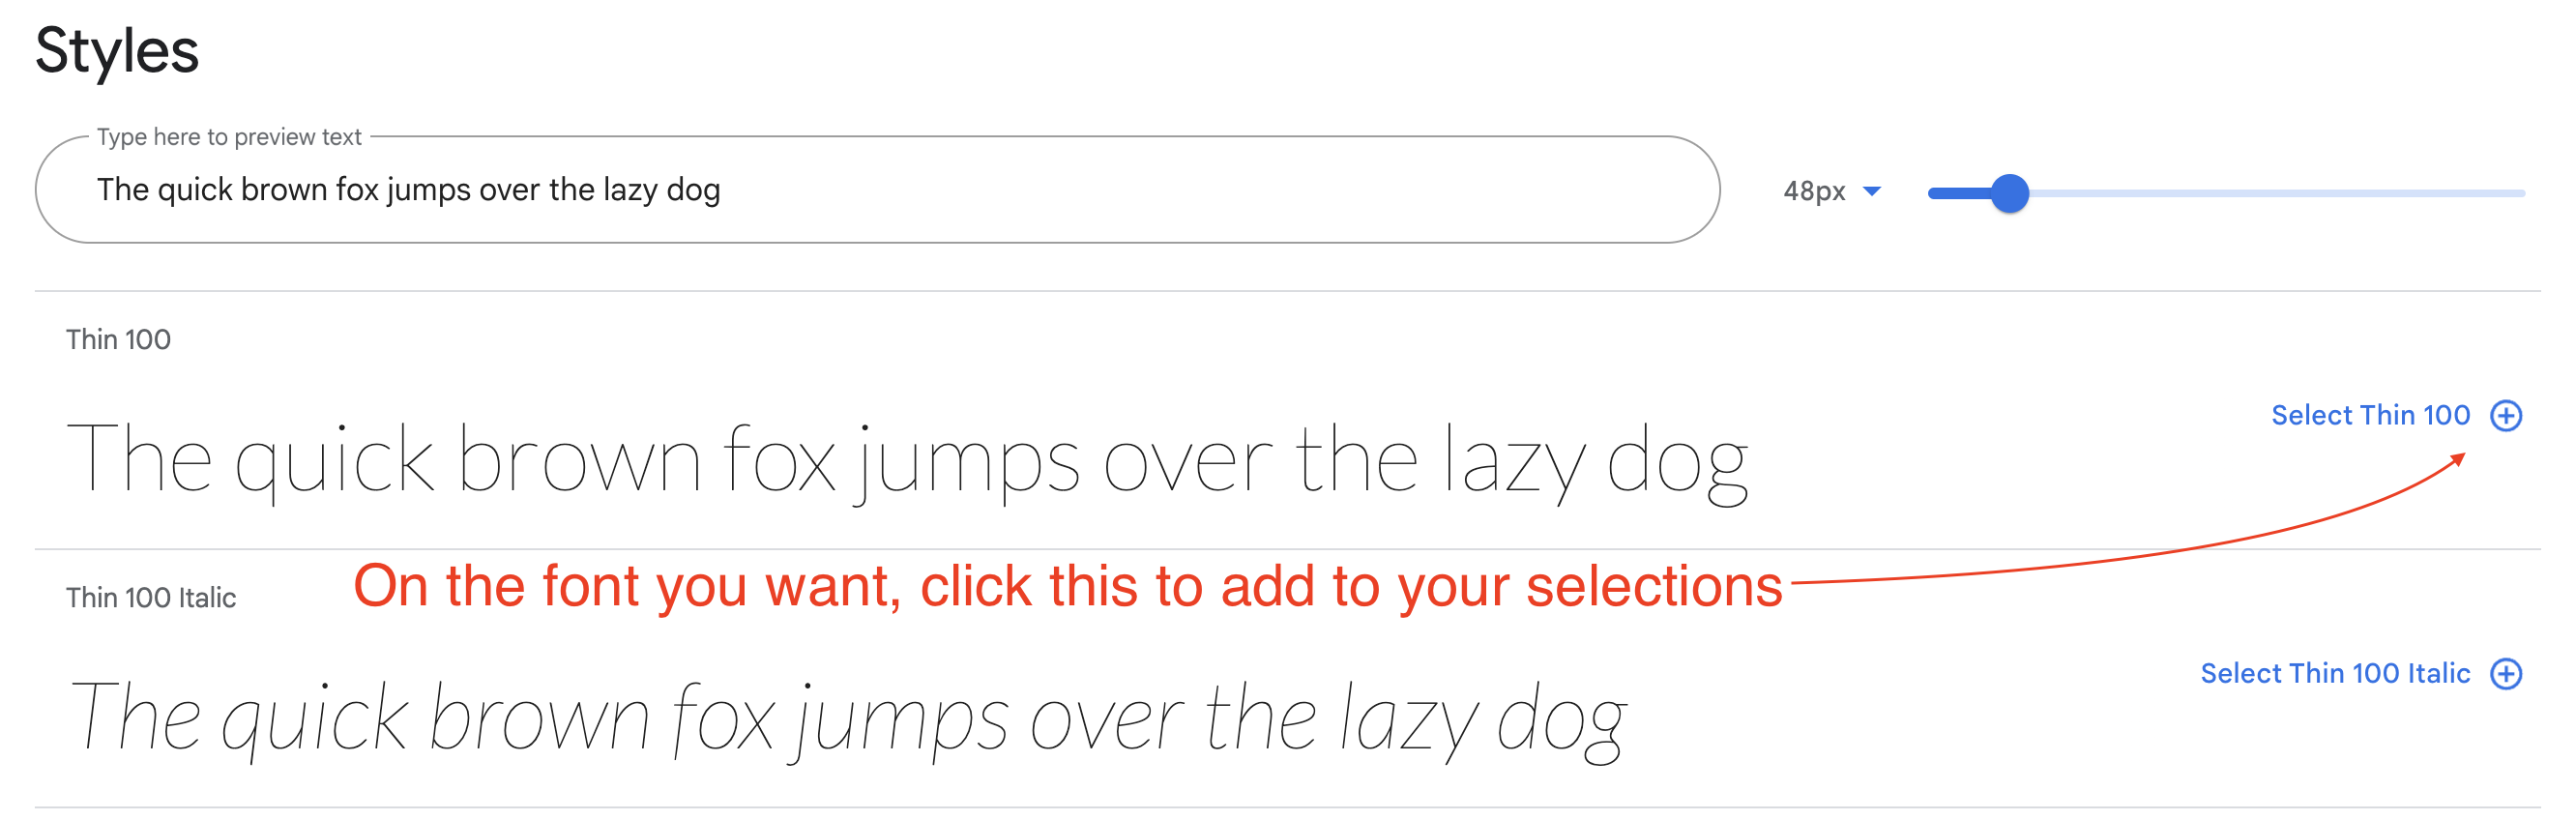
Repeat this for all the font and font styles you want, but be selective. Don’t choose fonts you won’t use, and don’t use too many. (Each font increases your page size, slowing down your site.)
Once you have selected all your fonts, if the tray on the right is not open already, click on the box-like icon at the top right to open it.
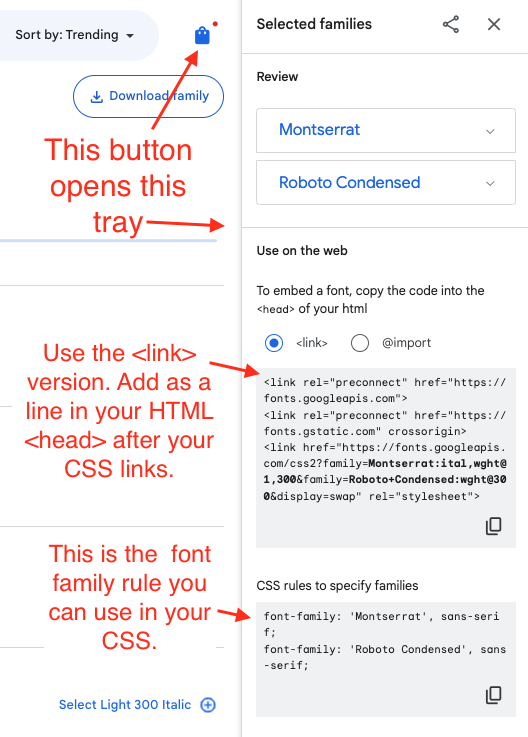
All your selected fonts will be rolled together into the <link> lines shown.
- Copy those
<link>lines and put them on each HTML page (or template) that will use the fonts. - In your CSS styles file, write rules that specify the font as needed.
The “CSS rules to specify families” example in Google Fonts shows you how to write each individual font as part of a style rule. Realize this is just part of the style rule. If you want to apply this Roboto font to all H1 elements, you would write in your CSS like this:
h1 {
  font-family: 'Roboto', sans-serif;
}