Getting started
These first couple of chapters deal with learning about command-line interface tools that allow us to work with our computer through text commands, which is essential in programming.
On Macintosh computers, the program to use is called Terminal and it is already installed.
Windows computers are built a little differently, and for us to work within the same environment Windows users have to install Git (and Git Bash, which comes with it) before we can go much further.
Windows uses must install Git first
Windows users have to install Git and Git Bash before doing moving forward with this lesson. These next few steps do that.
- Go to Git Downloads, and download the latest version of git.
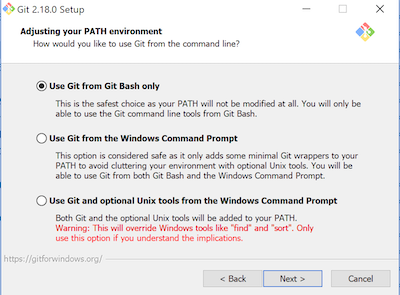
- Run the installer and follow the prompts as you normally would, choosing the defaults (except for this):
When you get the screen below (or something like it) you need to choose “Use Git from Git Bash only”.
- Use the default settings for everything else.
- You should now be able to find the program Git Bash from your Windows Start menu. Go ahead and launch it.